|

Not sure if this is a continous series, but a few years ago I "discovered" a modeling technique wich compeltely replaced any curved based modeling aproaches I find in other applications. Since most 3d applications define this type of geometry as illegal, this method only works in blender, MarbleClay and partly in Houdini. This method is nothing really hidden, or actually special, but people comming from other applications might have a hard time actually discovering the method.
If you are learning modeling with your favorite 3d application, you propably have encountered curve based modeling, wich has some advantages
and disadvantages. Most prefer it for it shape control on round / controlled surfaces
There are several problem with curve based modeling, namely:
- - You have only access to a limited bunch of tools at hand. Some modeling operations do not work with curves.
- - Since the 3d representation of a curve would be a nurb, you are dealing with interpolated data further down the modeling path, either when patching the curves to polygon, or, if your 3d application supports nurbs, when freezing the geometry. You then have to iterate through the new polygons to fit your shapes, wich is a time consuming process, and creates less controleable output.
- - Most of the times curve objects are separate entities wich do not mix well with traditional polygons.
These are the reasons why this technique is used less often when modeling.
Now what if I told you, there is a technique to bring some curve based into your modeling workflow, mix it with traditional polygons, use most of the polygonal tools on it. And its in vanilla blender since 2.4x versions, and hidden in plain sight...and is just a switch in mind on how you approach things ?
Its plain simple, best explained by when you see the 2D elements of 3D Shapes: The 2D representation of a nurb is a Curve
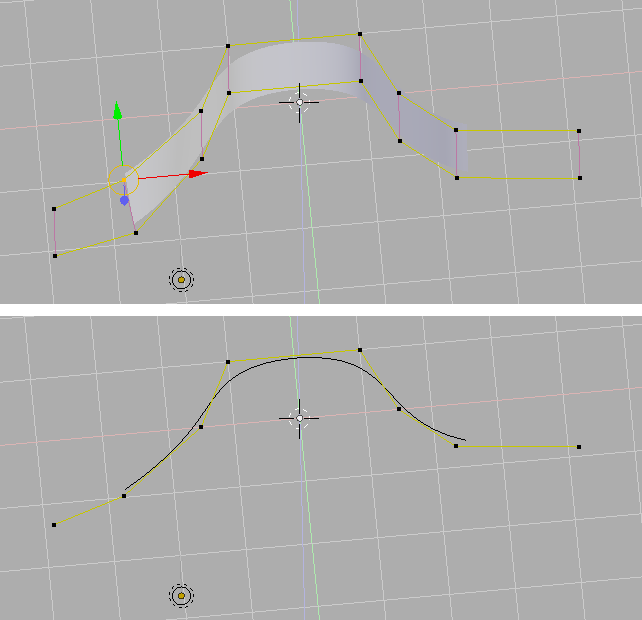
The 2D Representation of a Polygon is an edge
The 2D Representation of a subdivided polygon is.. well a subdivided edge
I could stop here, just extrude a point to an edge, apply a subdivision modifier to it and generate your shapes. . use subdivided edges in you workflow as you would use curves. Since most applications do not support loose edges, or do not subdivide them, this is a pretty unique feature to blender.
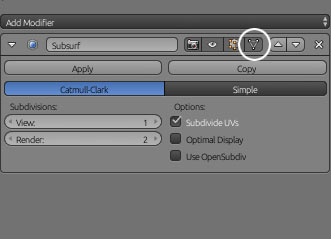
In 2.7x and below you have to activate the fourth mode (subdivision modifier applied in edit). In 2.8 you can keep it at the third level since you see the "curve" and the unsubdivided edges
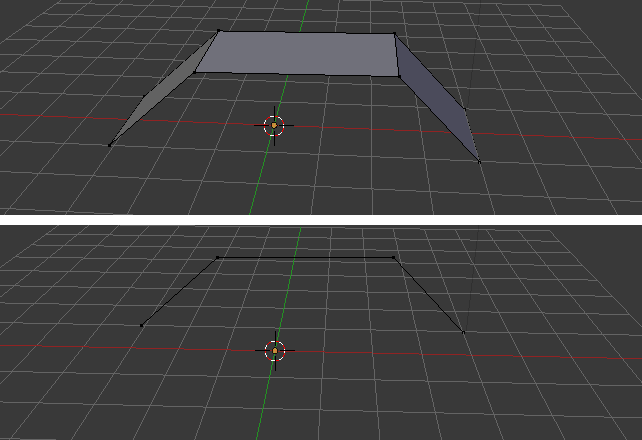
This method has several advantages:
- - You have complete control over your point / polycount, no additional geometry is created to care about. (Of course if you apply the modifier you get additional geometry :) )
- - You can mix polygon and "curve" based workflow seamlessly.
- - Most of the polygonal tools work with edges (Knife doesn't, it did in 2.49 and below. So you have to subdivide the edge and move along the edge instead)
- -Unlike other packages, edges are not rendered, and besides their impact on connected patches, you can easily keep them in your model without any problems rendering wise.
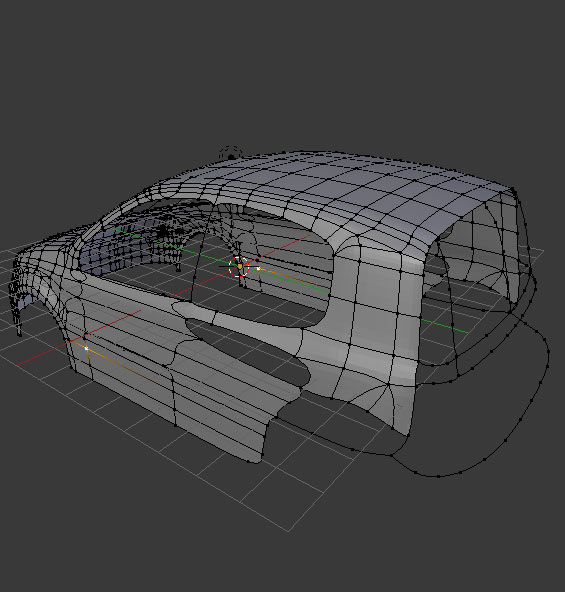
For this car model I initialy generated the splines from the blueprint and patched (Grid Fill) the parts wich have been defined enough

Basic Character (based on images I do not show here) Again I partly started to patch some parts, while there are
still some loops misssing. Thats one of the things I like about this workflow: complete freedom on how you aproach things:
you don't have to go through a set of linear tasks first.
Disadvanatges
- This method is slower than traditional box modeling, but imho gives you more control and you gain alot of speed when you model more complex shapes. Also if you get used to the method, you tend to "overuse it" on parts where traditional box modeling would be more apropriate.
- Before 2.8 you have to select the top right icon "Adjust edit Cage to Modifier result" (4th icon in the top row of the subdivision modifier, circled icon in one of the screenshots above) By doing so the end and start point of an unconnected edge loop are interpolated (not in the correct position). In 2.8 this is solved.
What else to know
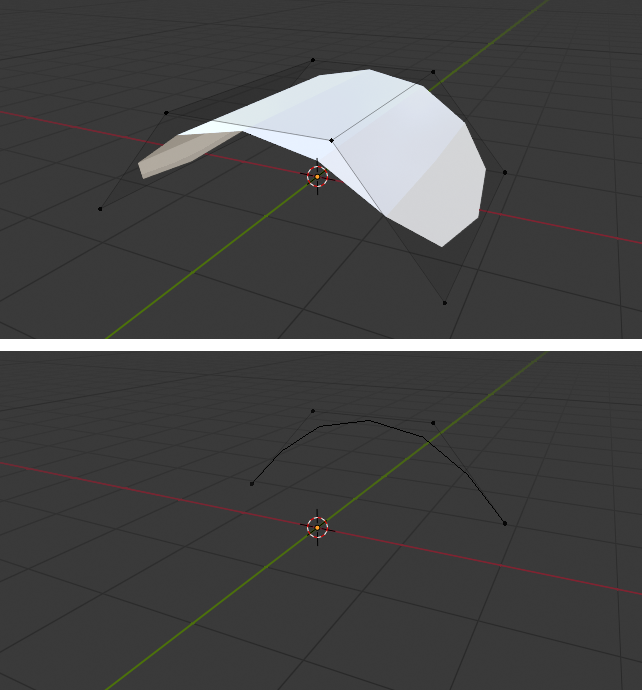
Patch Curves is Grid Fill, just select the adjacend edge loops and launch the command. Notice that it also interpolates between two different loops with different pointcount.

This method is also quite handy when doing retopo work, although as said, better control comes with the price of slightly slower speed.
Thats all, doesn't sound as much, and you propably have stumbled upon it yourself, (especially now in 2.8 where its more obvious). But I didn't saw that many tutorials using this method, in the last few years.
I hope I can inspire other people to get this workflow in other packages / try it out in blender for yourself. It drastically changed my aproach of modeling certain objects, and I propably will never return to a curve based workflow in the near future.
So why is this method so special
- Basically you can transfer all curve based modeling aproaches into a subdivsion based modeling environment. Without loosing any level of freedom you have with your
- Using subdivision edges instead of polys allow you to quickly draft out your shape, define poly loops to your liking without having to care about additional geometry you would have to deal when you would extrude an edge to a polygon.
A good example is modeling a car from a blueprint: You first draft out the the shape according to the images used, and in the second pass add additional loops and polygons to follow the shape. Unlike a traditional subdivision method, where you allways have to tweak all points of the newly generated polygon with each extrusion step. With the edge based method you only have to care about the newly extruded point and tweak the point you have extruded from..wich imho makes it faster to define your shape / proportion etc. You basically deal with a lot less points.
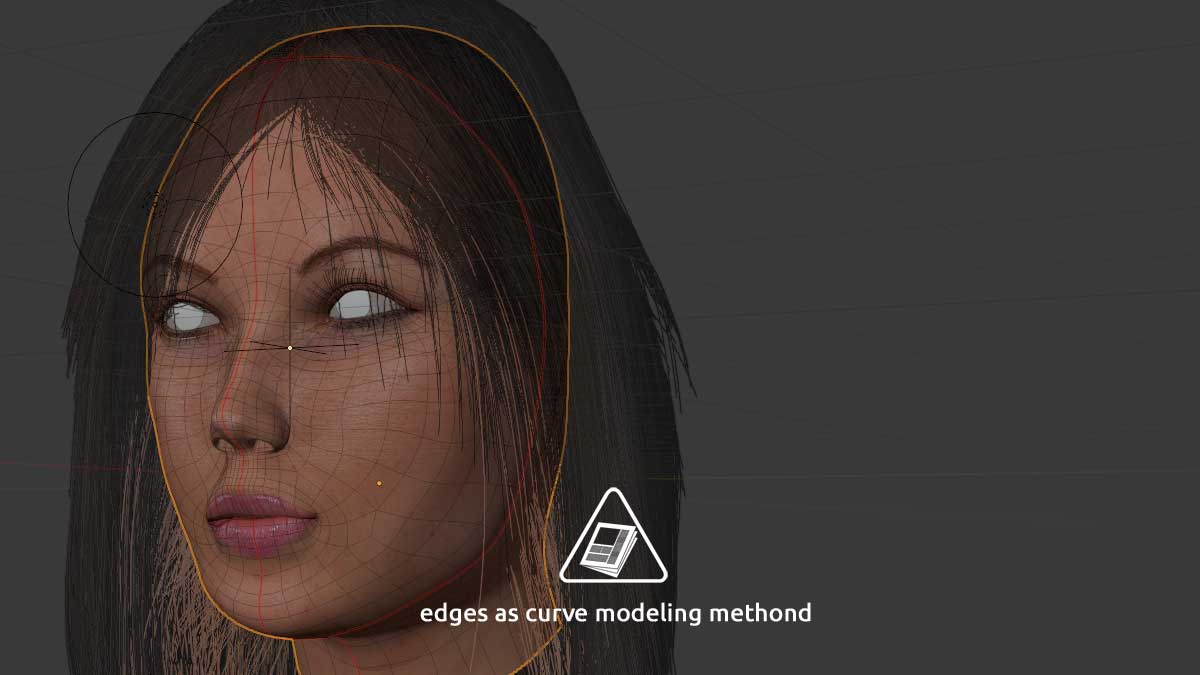
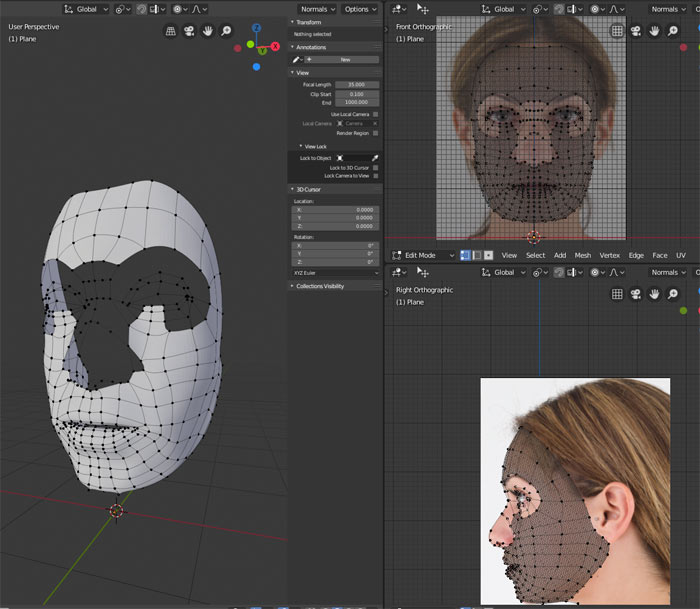
This also goes for the traditional side/front view of faces. I primarly start those by defining the profile of the face using edges, then extrude points from those to defined points on the face (for example where eyes start / end). Then in the next step I subdivide those lines and shape them to the liking.
- You loose nothing. Creating faces with this method does not result in some "illegal" geometry..this is not some 2point poly problem (where you have to delete some geometry afterwards. When you create a face with this edge included, its part of the face: No extra geometry to deal with
And yes a video tutorial would be really better suited, will look if I can make one this weekend. For the moment this is a small screencapture on how I would lay out the propotions of a face wich would later be refined by more curves / points between curves, and a screenshot on how a partly patched face looks like (screenrecorder crashed on second session)
And the result before the crash (Renemebr this is an unrefined mesh:
|